
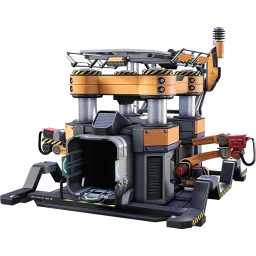
SatisfactoryBase has three views that share one workspace: the planner (one factory at a time), the map (nodes, collectibles, factories and routes) and the overview (all factories and the links between them). Without an account everything is stored in your browser; inside a world it is saved to the world and can be shared.
Planner: an editable graph
Every factory is a graph you build by hand: place machines, power, storage and other nodes and wire them together; the solver only balances the flows on the graph you drew, it never adds machines for you. The left panel shows a Summary of the whole factory – net power, machine counts, build cost, raw resources in and surplus items out, plus a Starved ports list when a machine isn't getting enough input (click a row to jump to that node). Selecting a single node swaps the panel to its Inspector (recipe, clock speed, Somersloops, machine count).
Factory config opens a drawer with three tabs: Raw resources (which ores, fluids and gases may be used), Inputs you already have (parts delivered from elsewhere, at a fixed rate), and Recipes (allow or block individual recipes and alternates). The Magic Wand and the "Allowed" recipe filter both use this configuration.
Adding nodes: the catalog menu
The toolbar at the top has one button per category; click it to open a dropdown of that category's items:
- Machine – a search field plus every production building; picking one opens its recipe list (filterable by All / Base / Alternate / Allowed, the last one following your Factory config).
- Power – generators (Biomass Burner up to Nuclear Power Plant, Alien Power Augmenter) and Power Storage.
- Logistics – splitters, mergers and a load balancer; shown as a preview, not placeable yet.
- Organization – Storage Container, Industrial Storage, the Dimensional Depot Uploader and an AWESOME Sink.
- Transportation – stations (Tractor, Truck, Train, Drone).
- Module – place an empty module or a copy of an existing one (see Modules below).
- Misc – Resource (miner/extractor on a node), Input and Output.
Place actions drop the node in the middle of the viewport; the rest open their picker or dialog. Click an edge to open the Transport panel: it lists the belts or pipes needed (tier, count, load) for that flow – see Belts & pipes.
The build wheel
Right-click the canvas or a node for a radial build wheel styled after the game's own build menu: a ring of wedges around the click point, with the current selection's name in the centre circle (hover a wedge to preview it there). On empty canvas the wheel opens at the catalog's top level, with a disabled Comment wedge at 12 o'clock (arriving with a future update); picking a category opens a nested ring with a chevron at the top of the centre circle to go back. Right-click a node for its own ring: Magic Wand (machines and outputs only), Configure (opens the node's settings), Duplicate, Enter (modules only) and Delete. In a read-only view the node ring only offers Configure. Right-clicking again while the wheel is open steps back one ring when you are inside a category, and closes the wheel when you click outside the disc. Escape, a left click outside the wheel, or scrolling closes it too.
Magic Wand
The Magic Wand builds the full production chain for a machine or an output node, all the way down to raw resources. Click its icon on a machine node (built for the recipe's main product at its current rate) or an output node (built for its target amount, or the rate already flowing into it) – the wand solves for that item and rate using your Factory config filters, then adds the missing machines and inputs upstream of the node, connecting only what isn't already supplied. The new nodes are laid out to the left of the target and nudged clear of the rest of the graph. A toast reports how much was added; Ctrl/Cmd+Z undoes the whole run in one step.
Hotbar
Signed-in users get a hotbar of ten slots (keys 1–9 and 0), with nine levels you switch between by holding Alt and scrolling the wheel over the canvas. Hover any entry in the catalog menu, the build wheel or a recipe/module list and press a number key to assign it to that slot on the current level (a toast confirms it), or use the small Assign to hotbar button that appears at the right edge of a row and pick the slot from its popover; pressing the key again without hovering runs whatever is on the slot, placing it at your last mouse position over the canvas. Right-click a slot to clear it, or drag between slots to swap them. The hotbar is saved to your account, so it is the same on every device; guests don't see it.
Undo/redo
Ctrl/Cmd+Z undoes the last graph change, Ctrl/Cmd+Shift+Z (or Ctrl+Y) redoes it, up to 10 steps back. History is tracked per module level – undoing while inside a module only steps through that module's own changes.
Modules
A module is a factory inside the factory: a nested sub-graph (at most 3 levels deep). Add one with the Module catalog entry, double-click it to enter, and use the breadcrumb bar at the top to go back up (the current level is kept in the URL as ?m=). Inside, Input and Output nodes are the module's ports; once an edge is wired to the module from outside, the port appears in Module settings (name, buildings inside, connected ports). The solver inlines modules into the factory, so a module behaves exactly like the machines it contains – think of it as a blueprint you can reuse and nest.
Map links: resource → factory
The map draws every resource node, resource well, geyser and collectible of the world data. The Layers panel toggles resources per purity (Impure / Normal / Pure), wells, and the collectibles (Power Slug Mk1–3, Somersloop, Mercer Sphere, Hard Drive); All / None / Defaults switch groups at once, and the View section controls background opacity, dimming and the 1 km grid. The planner header's Show on map button jumps to a factory's marker.
Inside a world you can place factories and stations on the map (right-click → Add factory here / Add station here) and connect things:
- Right-click a marker → Connect from here…, or use the Connect tool and click the start, then the target.
- Node → factory creates a resource link immediately, with extractor defaults. Its panel sets the extractor (miner mark or fluid extractor), clock %, satellites for wells, and shows purity and the resulting rate (the formulas of Resource nodes & miners) plus the belts or pipes needed. Resource nodes connect to factories only, and each node once.
- Factory → factory or station pairs open a New factory link / New vehicle link dialog (vehicle, item, amount).
Links sync into the planner automatically as locked input, output and resource nodes – their amount is edited on the map or in the overview, not in the graph itself.
Plan this
Item and recipe wiki pages carry a Plan this button: it opens a factory picker (your local factories, or – signed in – the current world's factories, another world you browse to, or "New factory") and adds the item or recipe as a node once the factory's planner opens, with a toast pointing you at the Magic Wand to build its chain.
Routes
Every link is drawn as a route on the map. Vehicle links carry a vehicle type (Tractor / Truck / Train / Drone, see Trains, trucks & drones) and stations have a kind (Tractor stop, Truck station, Train station, Drone port). Toggle Routes to show the lines and Animate vehicles to watch markers travel along them. Double-click a selected route to add a waypoint, drag handles to move it, Alt+click or right-click a handle to remove it, and Reset route to straighten it again.
The overview shows the same factories as nodes with the plan links as edges; drag from a factory's output handle to another factory's input handle to create an item link, and edit item, amount and belts/pipes in its Transport panel. Resource and station links are edited on the map.
World seed
The World seed section of the map's Layers panel reproduces the game's New game options (Biomes → Game modes):
- Seed – a signed 32-bit integer (−2 147 483 648 … 2 147 483 647; empty = 0, the vanilla world).
- Nodes – Default / Random / Basic Resource Rich / Advanced Resource Rich / Fossil Fuel Rich (resource node randomization).
- Purity – Default / All Pure / Mostly Pure / Average / Mostly Impure / All Impure / Random.
Press Apply; a badge such as Seed 42 · Random · Mostly Pure purity shows that the nodes were re-rolled, and Default restores the vanilla map. Node type and purity change exactly as in the game, so the node counts of the wiki no longer apply. Resource links on changed nodes warn Resource changed by seed or Purity changed by seed. Outside a world the seed lives in this browser only (URL hash and local storage); inside a world it is the world's seed, saved with the world and editable under the world's settings.
Sharing
Worlds are Private by default; a Public world can be viewed by anyone with the link (map, factories, statistics), and signed-in users can fork it. The local workspace (no account) is never shared.
Quick start
- Pick a start location and find the nodes around it on the map.
- Create a factory, place the machine for the item you want (or use Plan this from its wiki page), then run the Magic Wand on it to build the chain down to raw resources.
- Link the nodes to the factory on the map; the extractor and clock settings become the factory's inputs.
- Check the Transport panel for belt tiers and the Summary panel for net power and starved ports; adjust clock speeds or Somersloops in the Inspector if needed.